Image Calibration and Alignment
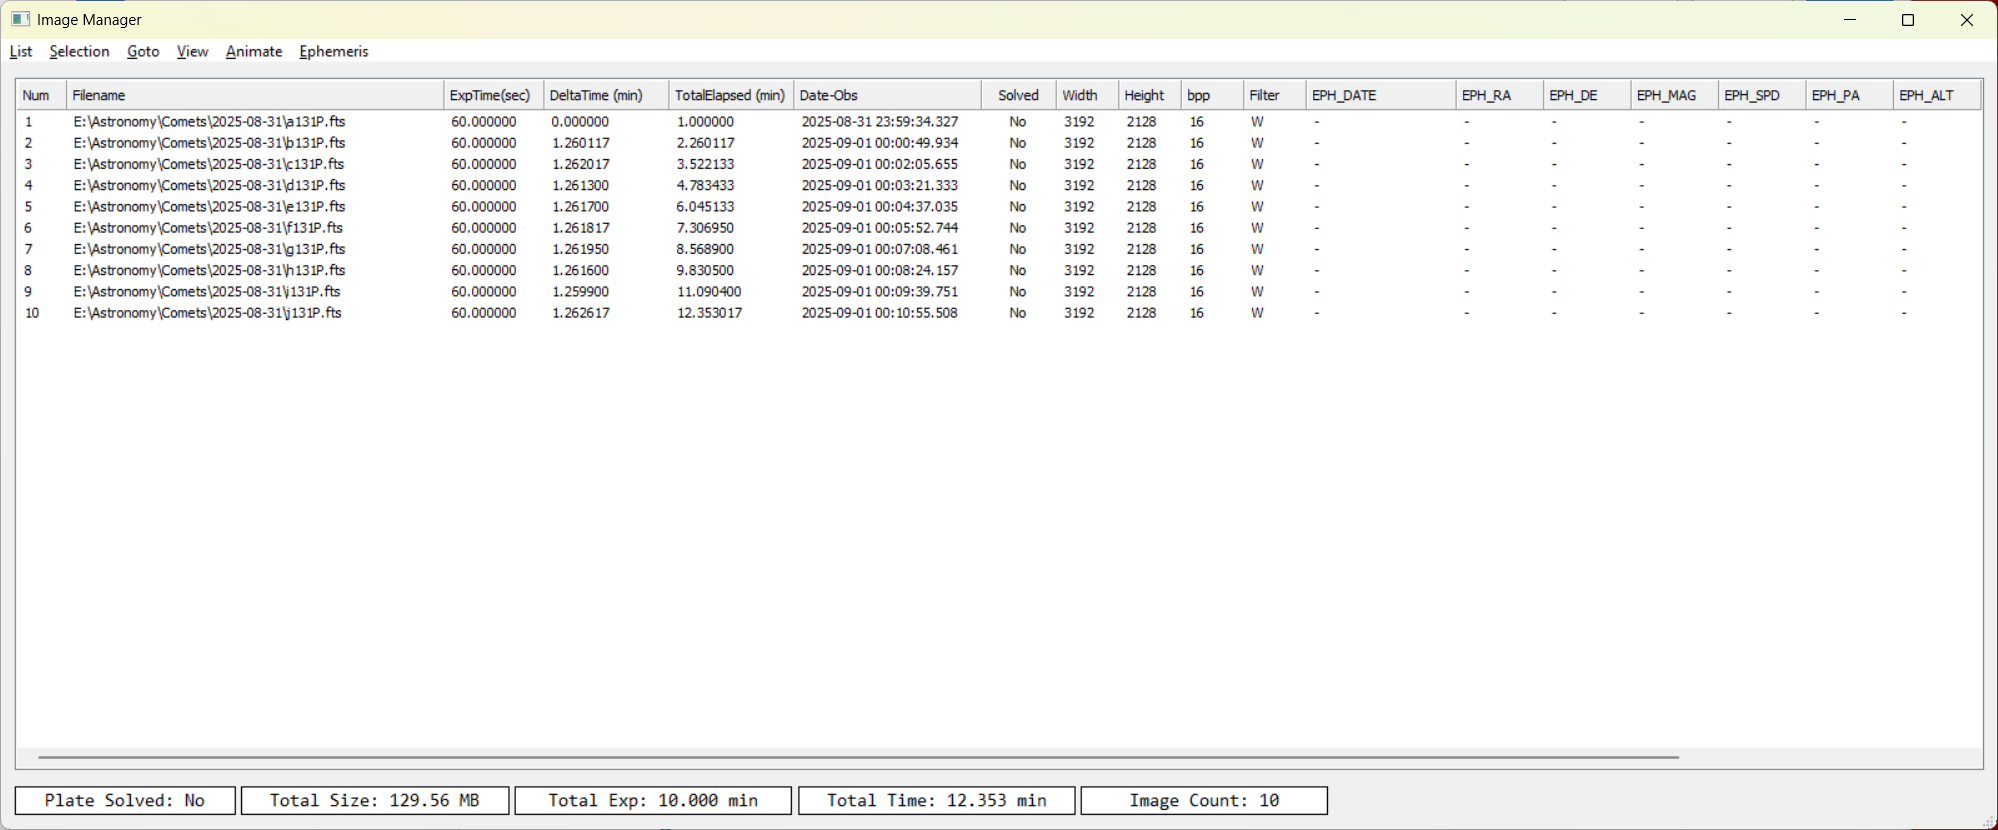
Load Images to Image Manager
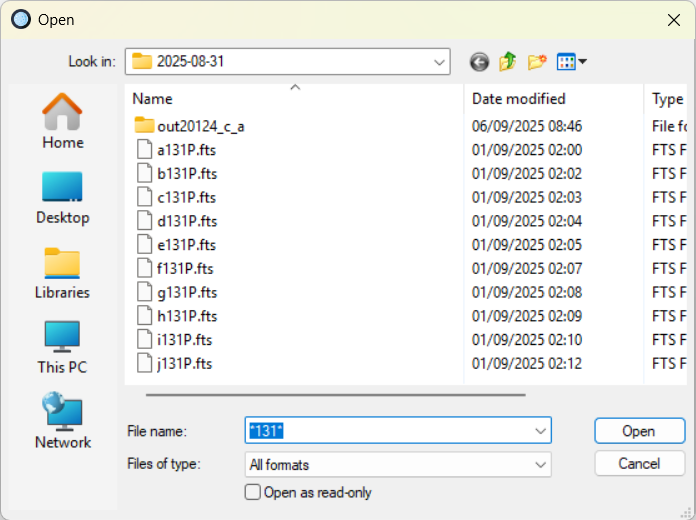
- In the Image Manager, go to List → Add Images (or press F2).
- Select the images from your hard drive and click Open.
- The images are added to the list of active images in the Image Manager.
Tips:
- If multiple comets are in the same folder, use wildcards like * or ? to filter files.
- The Image Manager shows details such as DATE-OBS, EXPTIME, and FILTER.
Image calibration
- Go to Action → Image Calibration.
- Define paths to Master Bias, Master Dark, and Master Flat files.
• Master Dark and Flat can be auto selected based on exposure, temperature, and filter.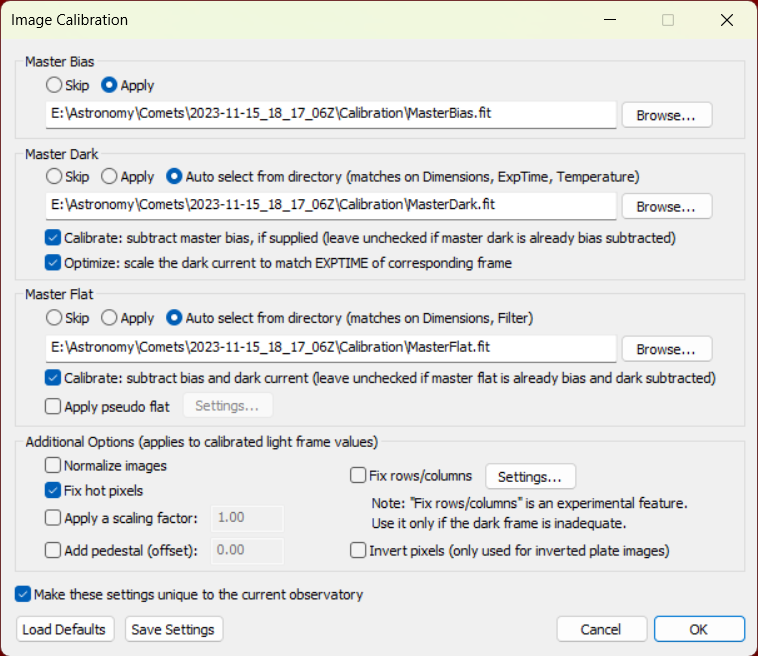
- (Optional) Enable:
• Fix hot pixels
• Fix rows/columns (if needed for your camera) - Click OK to calibrate the active images.
Important:
• Normalize images is recommended only when using Synthetic Tracker or Fast Track. For precise photometry, do not use normalization.
Example Progress Log:
[2025/09/06 13:55:49]: Begin calibration...
[2025/09/06 13:55:51]: Save complete.
Notes:
- If your images are already calibrated externally, skip this step or only apply Fix hot pixels.
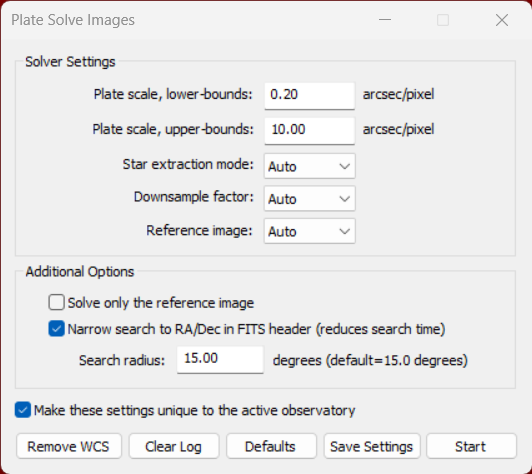
You can save Plate Solve settings specific to the active observatory by selecting Make these settings unique to the active observatory.
Plate Solve Images
- Go to Action → Plate Solve.
- Click Start to begin.
Notes:
- Default settings usually work.
Example Progress Log:
[2025/09/06 13:58:48]: Found plate scale=[1.17]
[2025/09/06 13:58:48]: Plate solving finished OK.
Once solved, the Image Manager shows Solved: Yes for each image.
Align Images
- Go to Action → Align Images.
- Click OK to start.
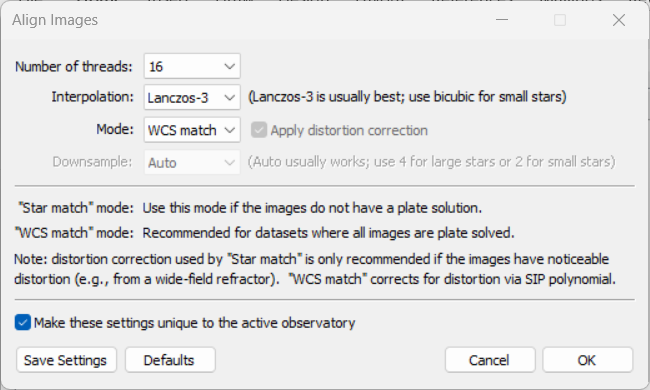
Notes:
- Default settings usually work.
Example Progress Log:
[2025/09/06 14:06:56]: AlignWCS: Alignment completed.
[2025/09/06 14:06:56]: Save complete.
Notes:
- The Images need to be Plate solved first.
Express Image processing mode
If you always run the same steps, use Express Mode:
- Go to Action → Express Mode (or press F4).
- Select the steps (Calibration, Plate Solve, Alignment, etc.).
- Click Start.

The selected steps run in sequence automatically.