Initial setup
Add new observatory
- Open Settings → Observatory (or press F7).
- Go to Action → Add Observatory.
- Enter the observatory name and location coordinates.
• You can also search by MPC Observatory Code and click Apply location from MPC code.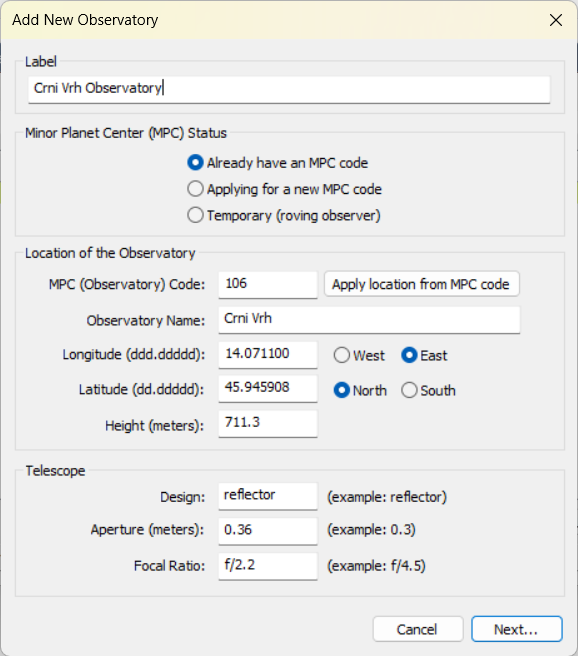
- Provide telescope information.
- Click Next.
- Enter details about your FITS images and CCD camera type.
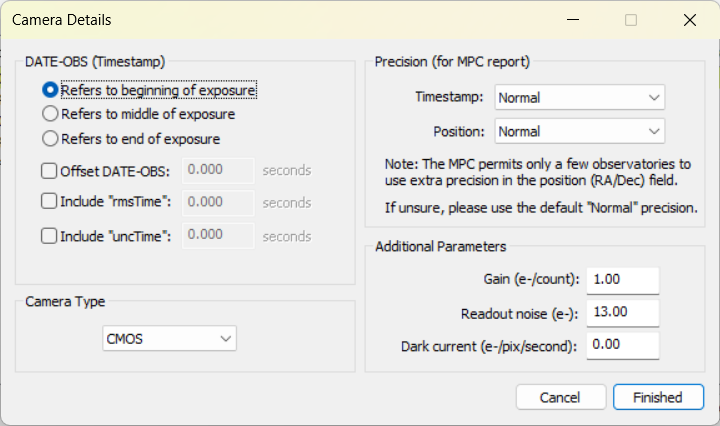
- Click Finish to add the new observatory to the list.
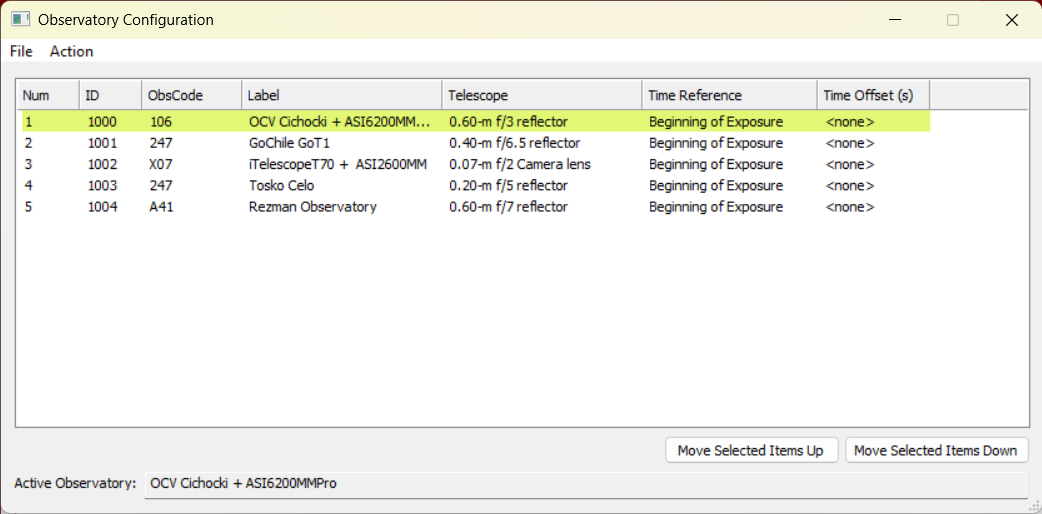
Activating the observatory before the measurements
If you have multiple observatories set up, you must activate the correct one before starting measurements.
- Select the correct observatory from the list.
- Go to Action → Make Selected Active.
- The active observatory is displayed in the Status window.

Configuring the Star Catalog
Next you want to configure the default star catalog that will be used for photometry.
- Open Settings → Star Catalog.
- For comet photometry (total visual magnitude), use the V band.
• The ATLAS catalog (recommended) covers the whole sky with ~1 billion stars down to mag 19, Gaia DR2 provides astrometry and APASS DR9 supplies photometric data. - Select the default filter used to acquire your images.
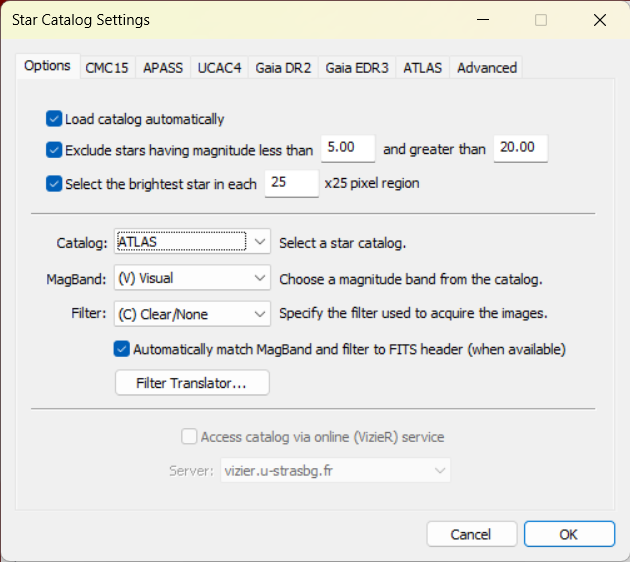
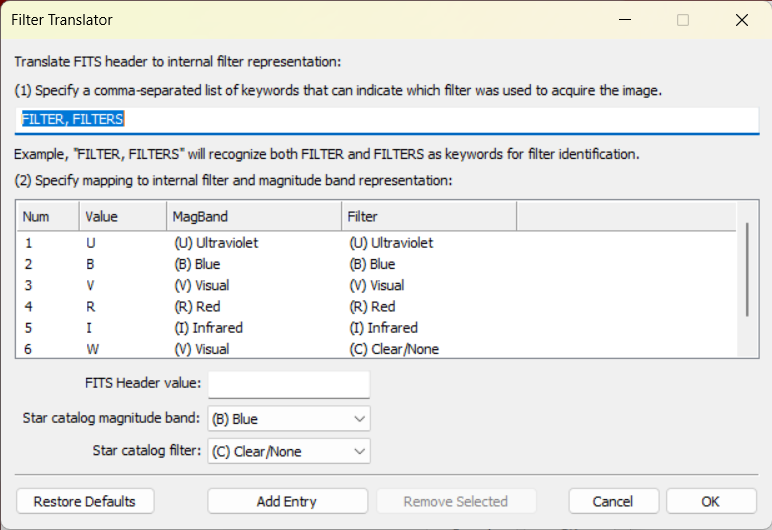
- (Optional) Use the Filter Translator table to automatically match FITS header filters to catalog magnitudes.
Note:
- You can install the catalogs locally. Provide the path to the extracted catalog on your hard drive.
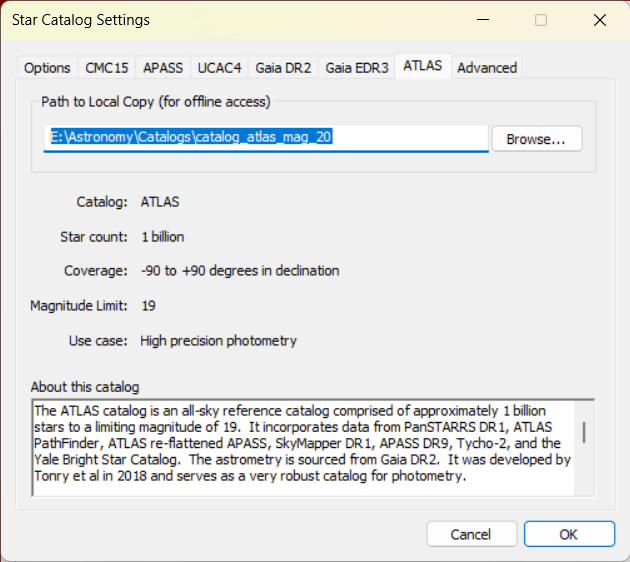
- Catalog downloads: Tycho Tracker downloads
For the complete ATLAS catalog up to mag 20 you need to contact Daniel Parrot (tychotracker@gmail.com)
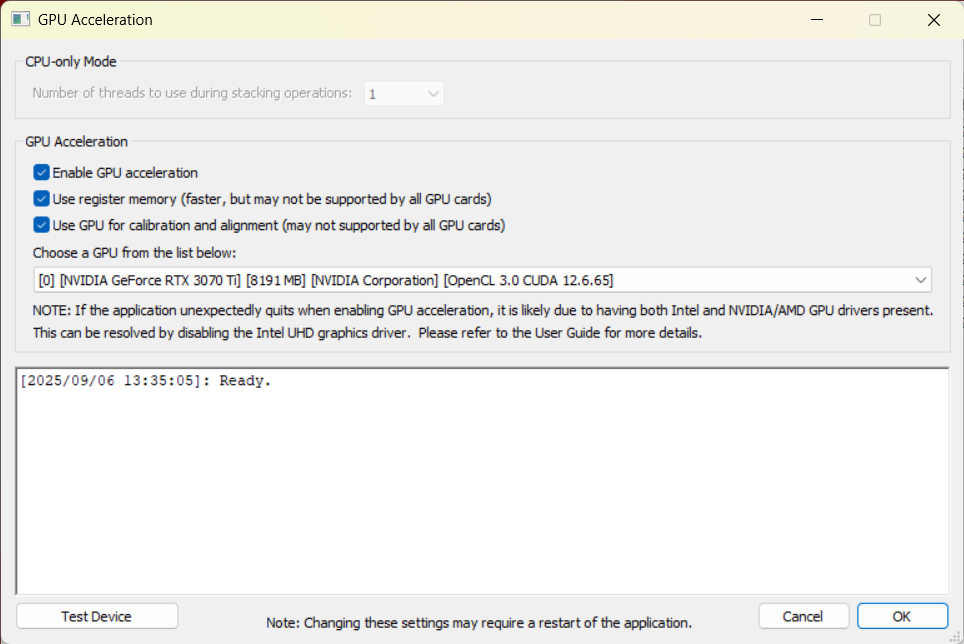
Enabling GPU Acceleration
If your computer has a capable GPU, enable GPU Acceleration to speed up image processing.