Stacking the Images
Assess the image quality
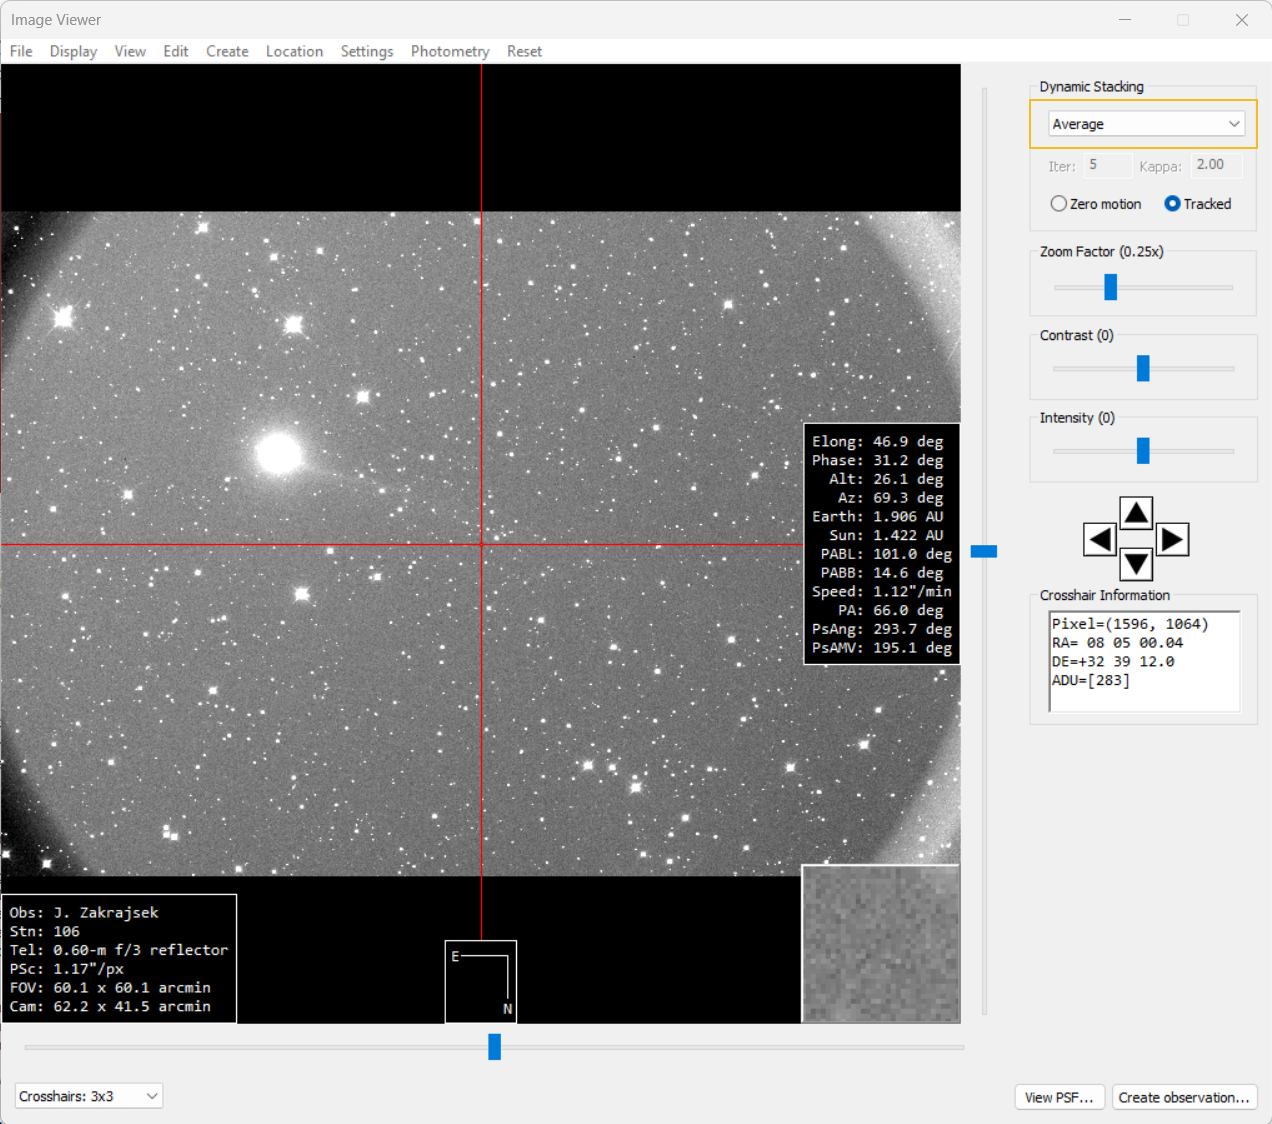
After processing and alignment, review your images for quality (clouds, satellite trails, fogging, etc.).
- Select the first image in the Image Manager.
- Open Action → View Images (or press F3).
- The Image Viewer opens with the image loaded.
Tips:
- Zoom out to see the entire field of view.
- Scroll through images by selecting them in the Image Manager.
- To flag bad images:
Right-click the image in the Image Manager → Flag for Removal.
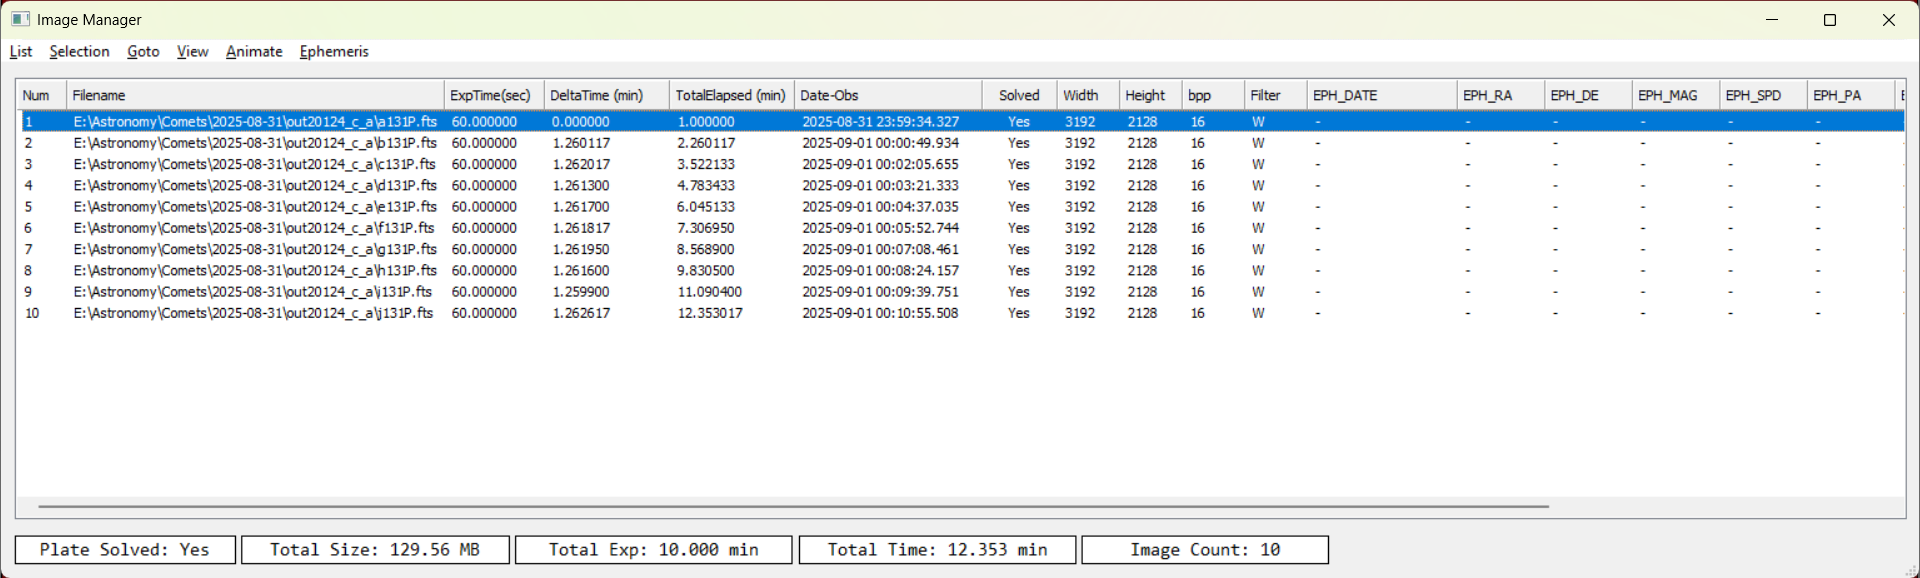
Examples of bad images: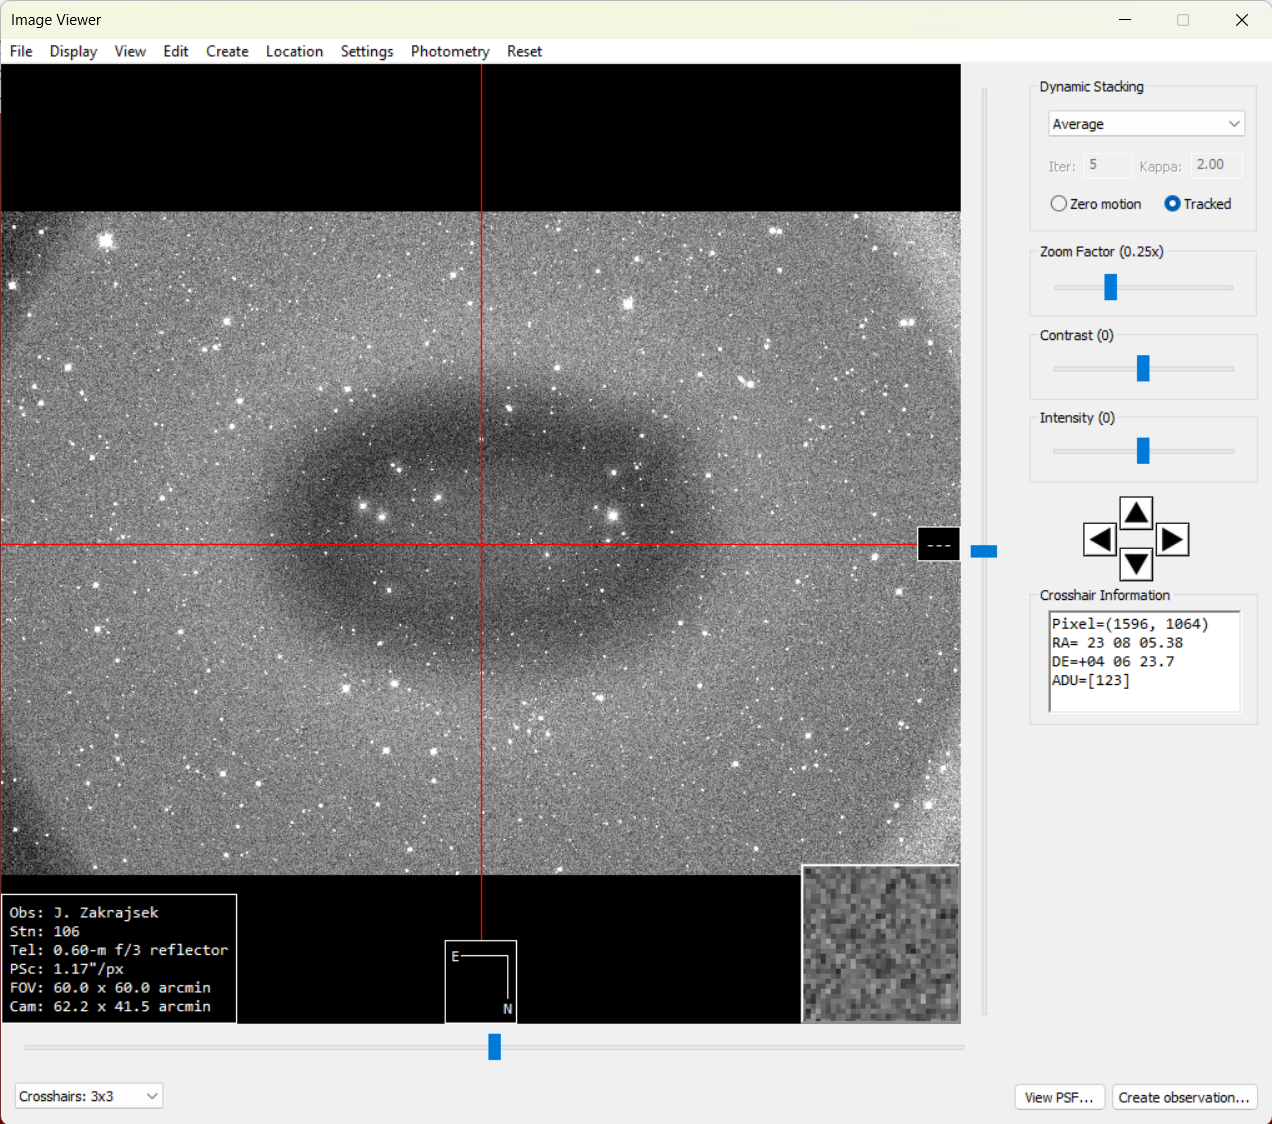
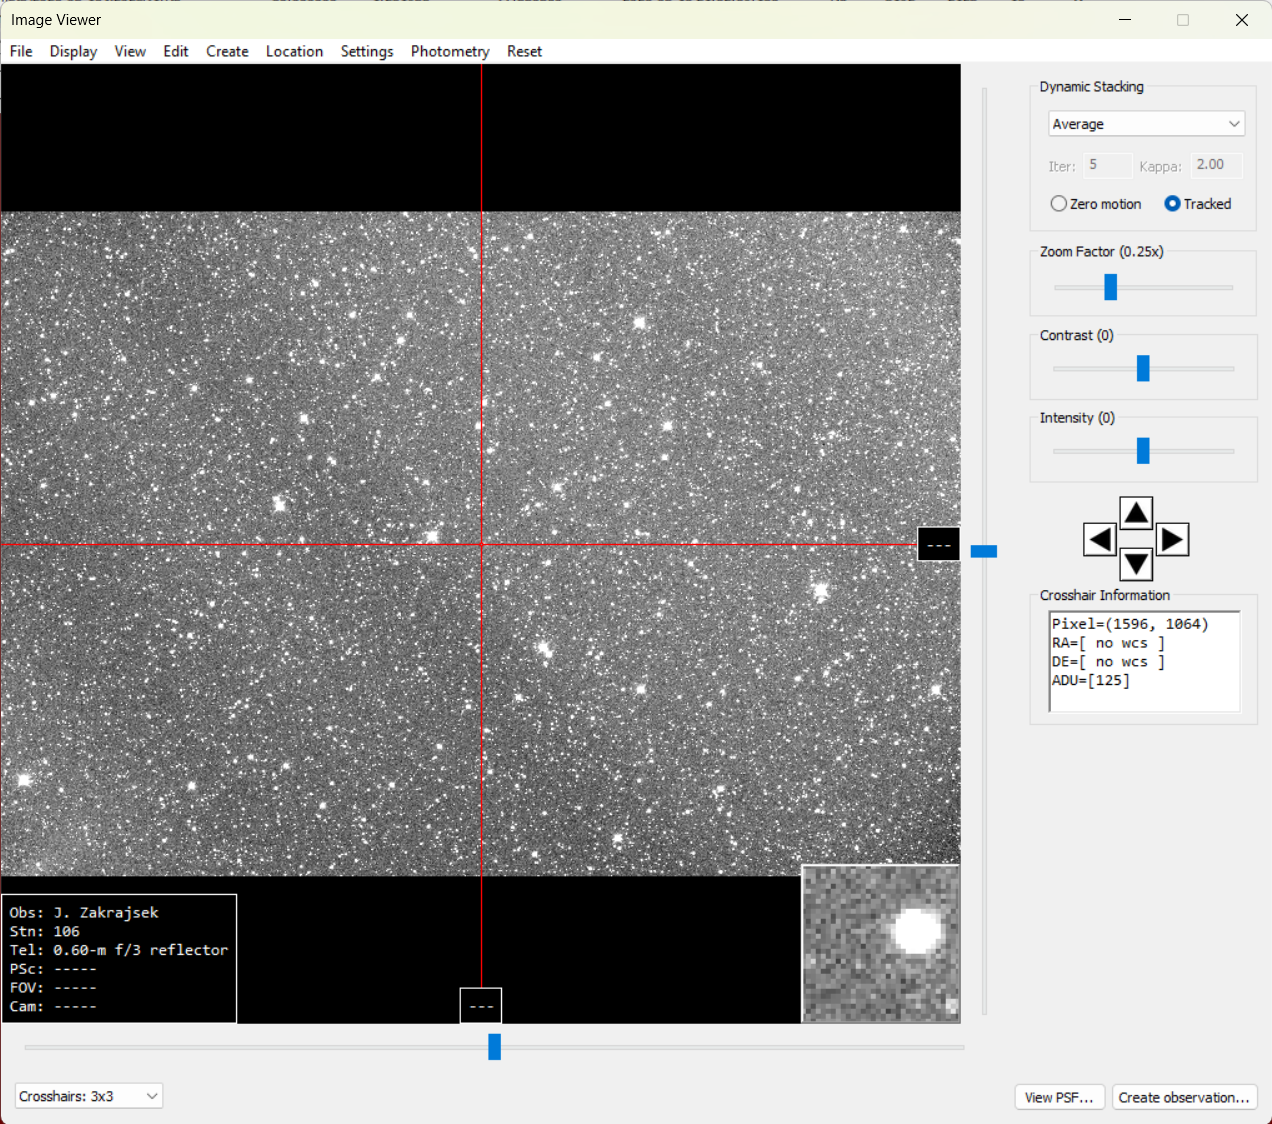
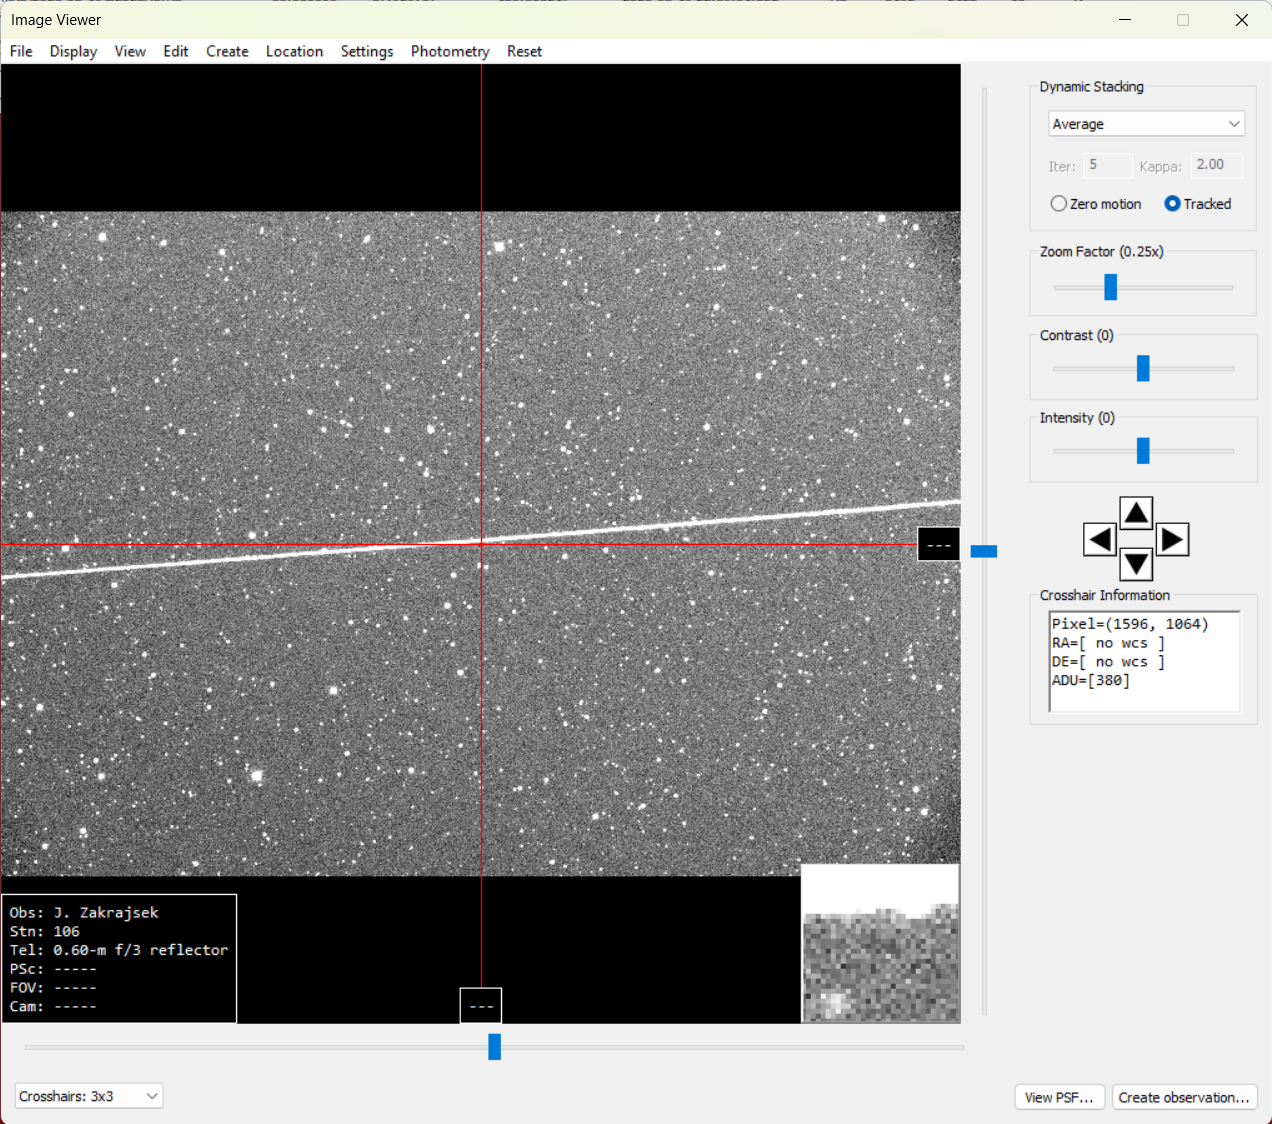
Figures: Camera fogging (left), passing cirrus clouds (middle) and Artificial satellites (right)
Remove flagged images:
- Close the Image Viewer.
- In the Image Manager, go to List → Reset.
- Then go to List → Remove Flagged.
- Flagged images will be removed from the active list.
Stacking the images
Attach Comet Ephemeris
- In the Image Manager, go to Ephemeris → Attach from JPL Horizons.
- In the JPL Horizons interface:
• Set Lookup Type = Asteroid or Comet Name.
• Enter the comet’s name in the Target ID field.
• Click Check Object.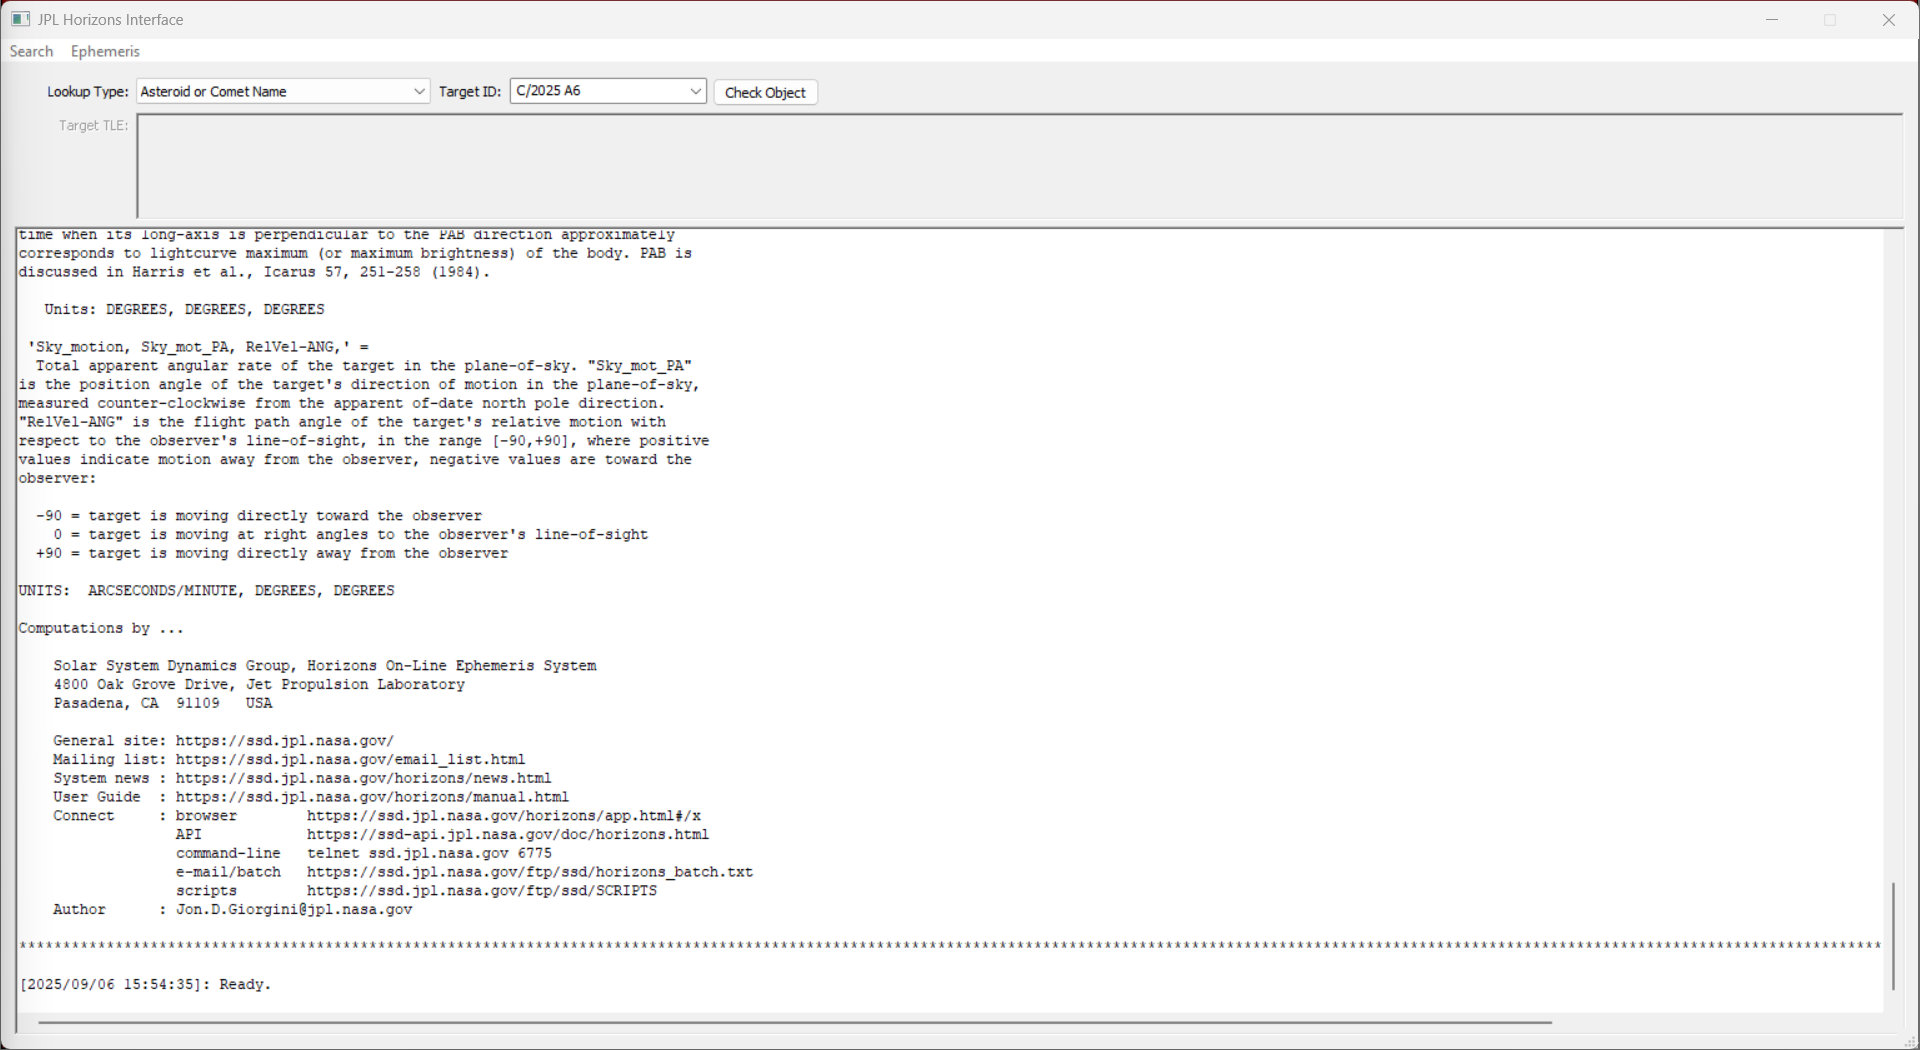
Example Output:[2025/09/06 15:54:35]: Ready.
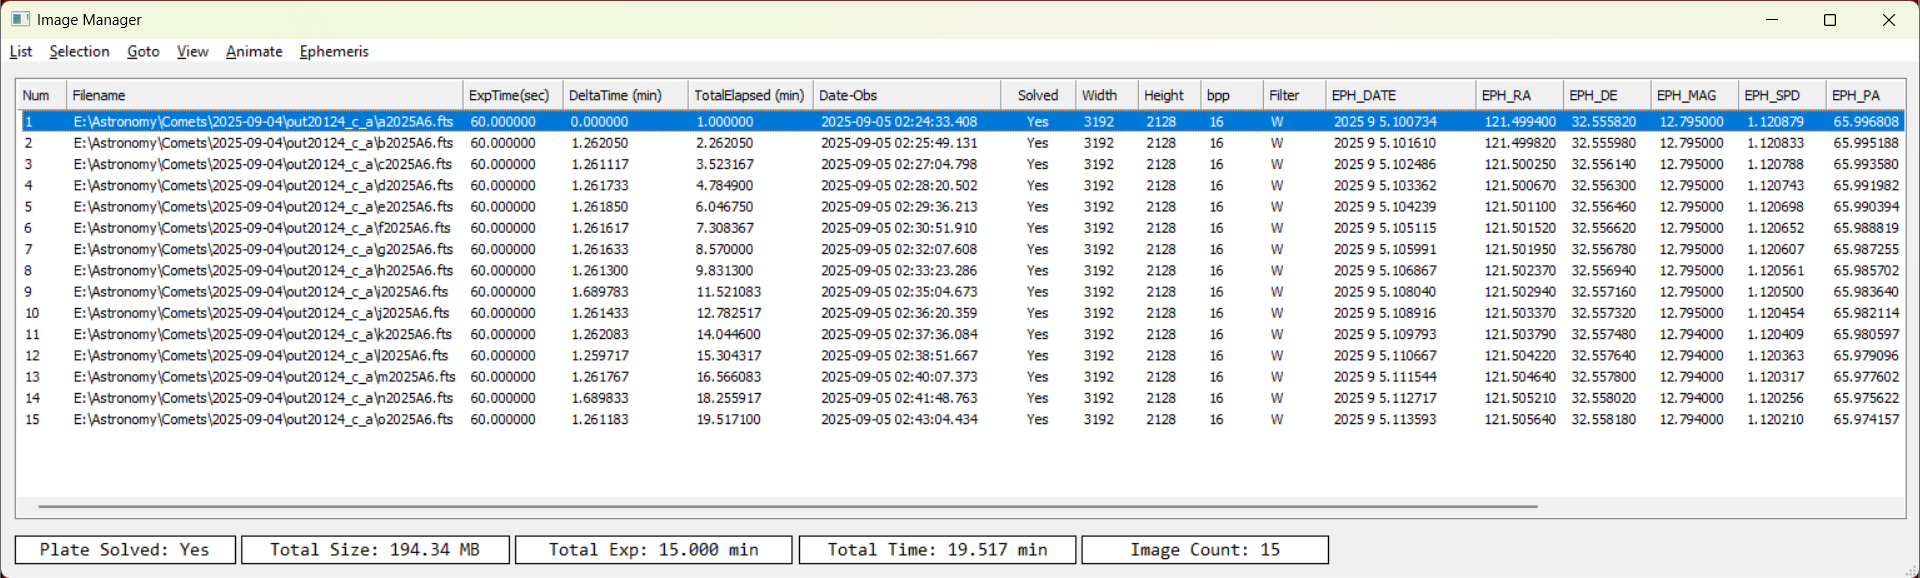
- Go to Ephemeris → Attach to Dataset.
- The ephemeris data is now added to the dataset in the Image Manager.
Stack the Images
- Select all images in the Image Manager.
- Press F3 (or go to Actions → View Images).
- In the Image Viewer, enable Dynamic Stacking and select Average as the stacking mode.